
A VPS (Virtual Private Server) is a dedicated Windows computer in a data center that runs 24/7 with enterprise-grade internet. Your algos run here — always on, always connected, even when your laptop is closed.
Your algorithms manage live positions in real-time. Even a 5-second internet disconnect can cause your algo to lose control of an open trade — stops won't fire, exits won't execute, and your position sits unprotected until you manually intervene.
Common risks on a personal computer:
Chicago data center. Enterprise internet. 99.999% uptime. Your algos run whether you're at your desk, on your phone, or asleep. It's $60/month to protect every dollar you're trading with.
Head to quantvps.com and click "Get Your VPS" in the top right corner.
QuantVPS specializes in trading servers — their data center sits in Chicago with 0.52ms latency to the CME exchange where NQ and MNQ futures trade. This is as close to the exchange as you can get.
Click "Get Your VPS" in the top right corner
You'll see the plan selection and configuration page. Here's what to pick:
4 cores • 8GB RAM • 75GB NVMe
Best for most users. Runs NinjaTrader + up to ~14 accounts comfortably.
More cores • More RAM • More storage
Recommended if running 15+ accounts or multiple NinjaTrader instances.
Configuration settings:
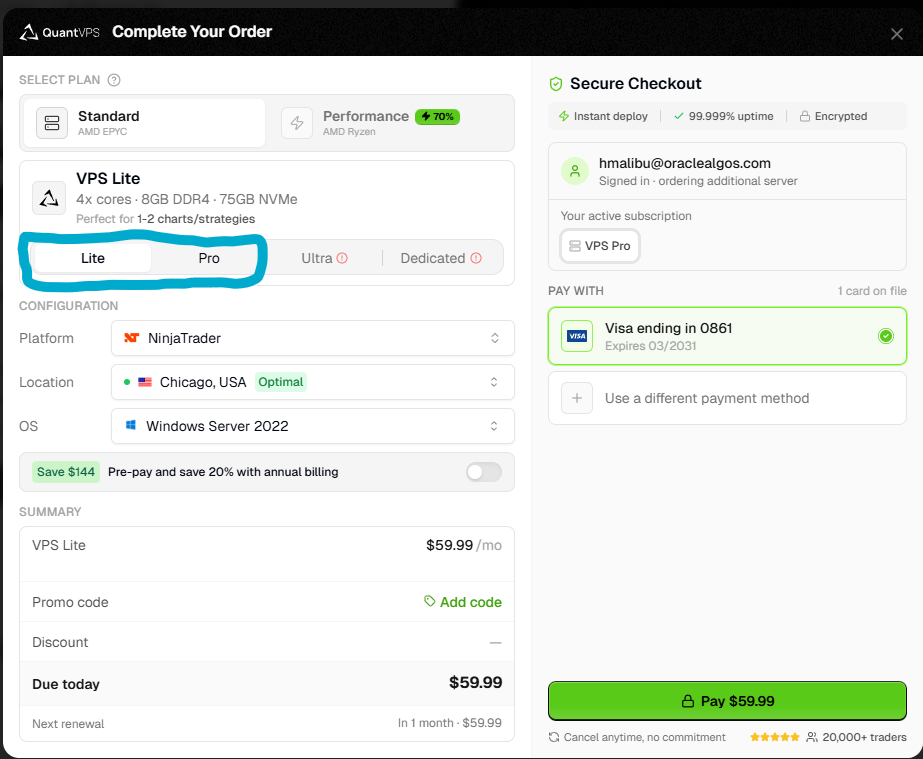
Select Lite or Pro, set Platform to NinjaTrader, Location to Chicago, OS to Windows Server 2022
If you know you're in this for the long haul, the annual pre-pay option saves $144/year.
QuantVPS walks you through a 6-step setup wizard. It's straightforward:
Enter your name, address, and email. Use your real name as it appears on your payment method.
Select "Other" and type "Oracle Algorithms".
Select NinjaTrader.
Select Yes and type your prop firm name (e.g., "APEX"). If you're not using one yet, select No.
If you use one, select Yes and enter its name. Otherwise, select No.
Review and accept, then click "Complete Setup".
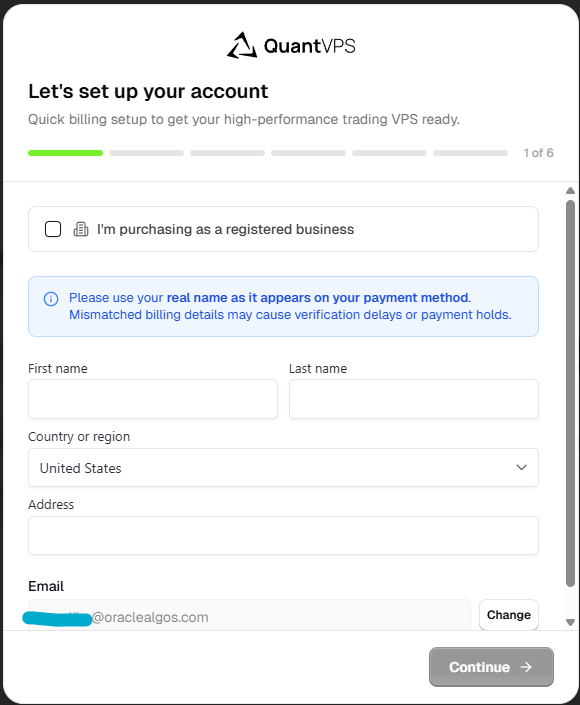
Step 1: Enter billing info
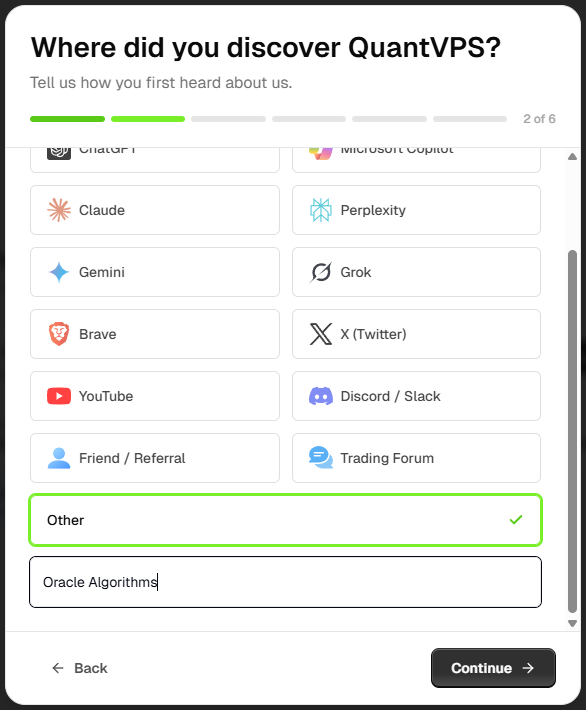
Step 2: Select "Other" → Oracle Algorithms
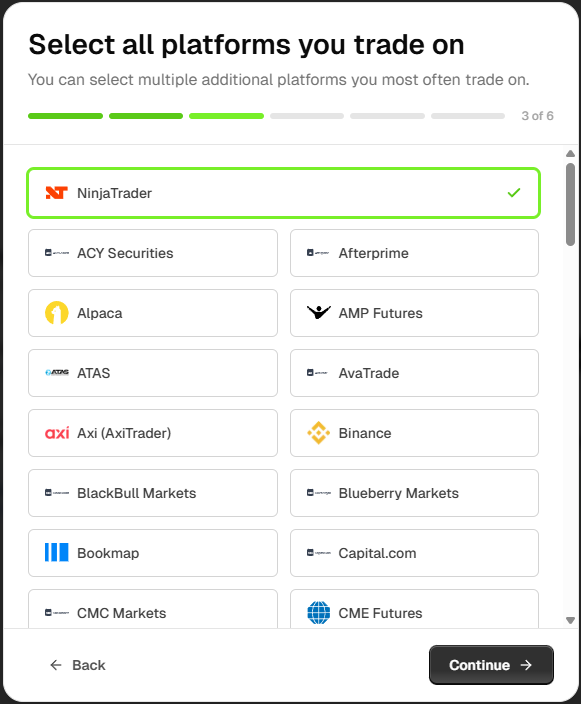
Step 3: Select NinjaTrader
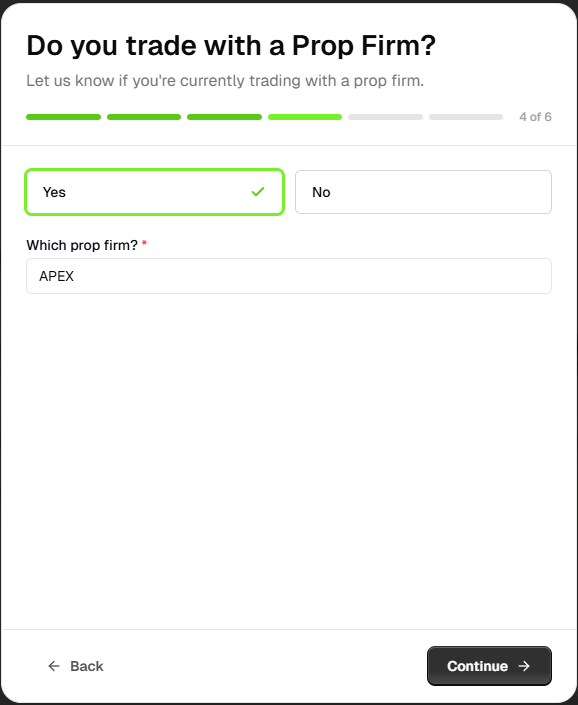
Step 4: Prop firm → Yes, enter name
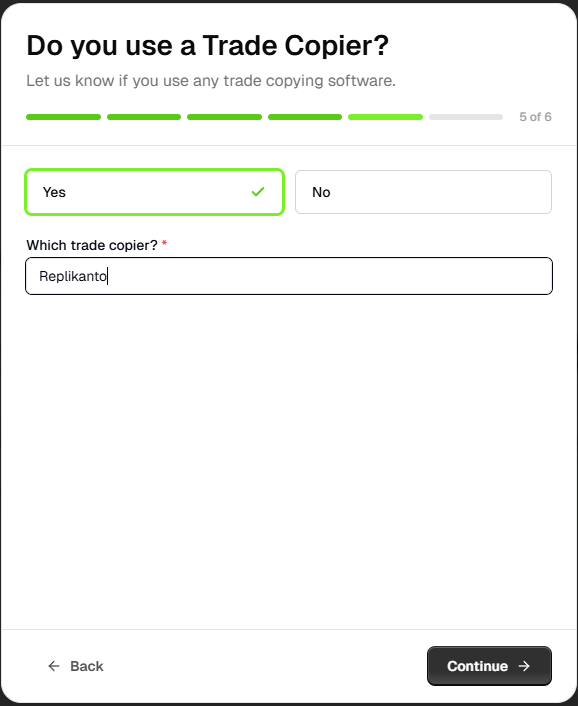
Step 5: Trade copier → No (unless you use one)
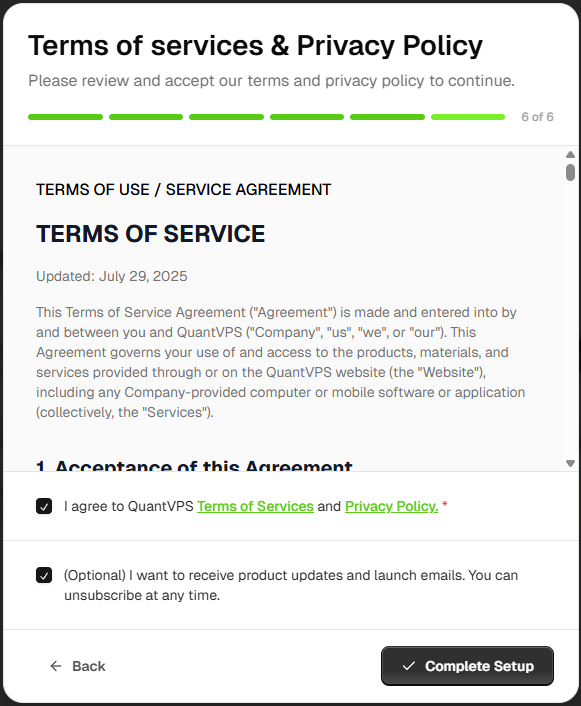
Step 6: Accept terms → Complete Setup
After completing setup, QuantVPS will show your Connection Credentials. You'll see three fields:
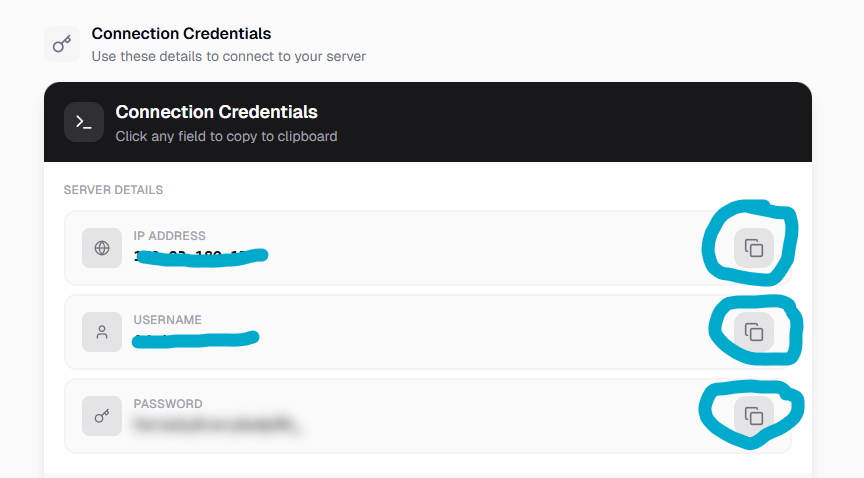
Use the copy buttons to grab each credential
You will need these every time you connect to your VPS. Save them in a password manager, a secure note, or write them down. Do NOT skip this step.
Windows has Remote Desktop built in — no download needed. Follow along with the screenshots below.
Click the Windows search bar (or press the Windows key) and type "Remote Desktop".
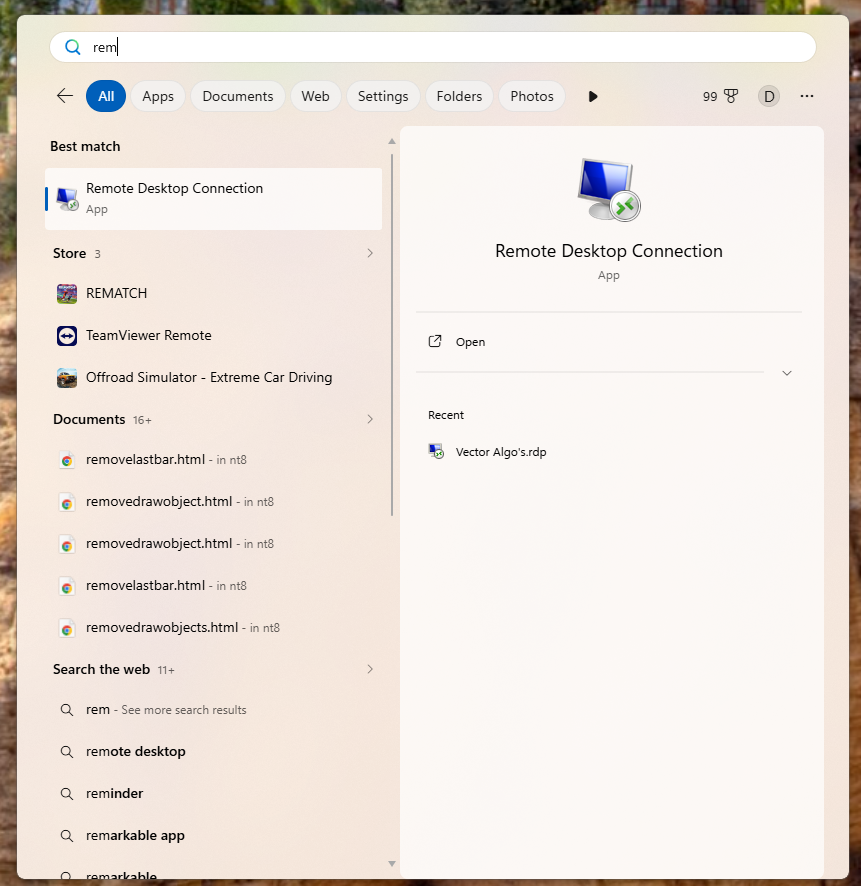
Type "Remote Desktop" in the Windows search bar
Click "Remote Desktop Connection" from the search results to open the app.
Click "Remote Desktop Connection" to launch it
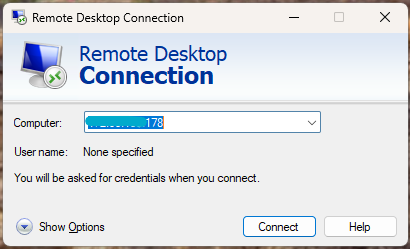
In the Computer field, paste your IP Address from Step 4 (your QuantVPS credentials).
Paste your QuantVPS IP address in the Computer field
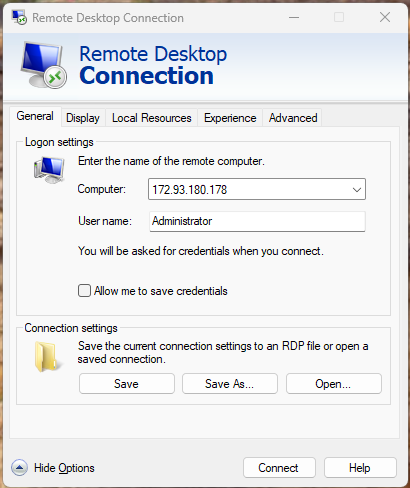
Click "Show Options" at the bottom left of the dialog. This expands the window to show the User name field.
Enter your Username from Step 4 (usually Administrator).
Click "Show Options" to reveal the User name field
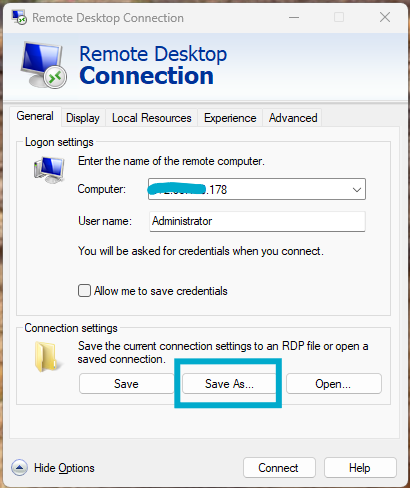
Under Connection settings, click "Save As..." to save this connection as a shortcut you can use every day.
Click "Save As..." to create a reusable shortcut
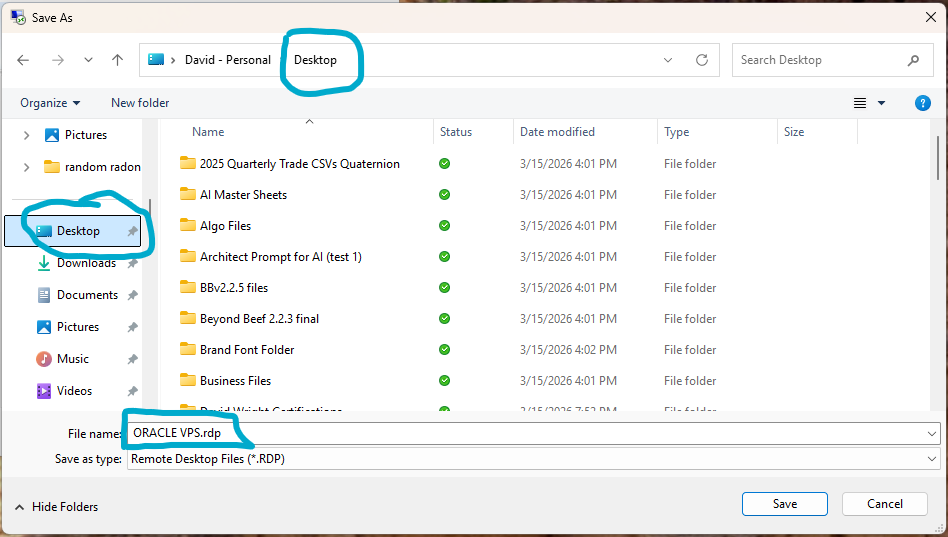
In the Save As dialog, navigate to your Desktop. Name the file ORACLE VPS and click Save.
Save as "ORACLE VPS" on your Desktop
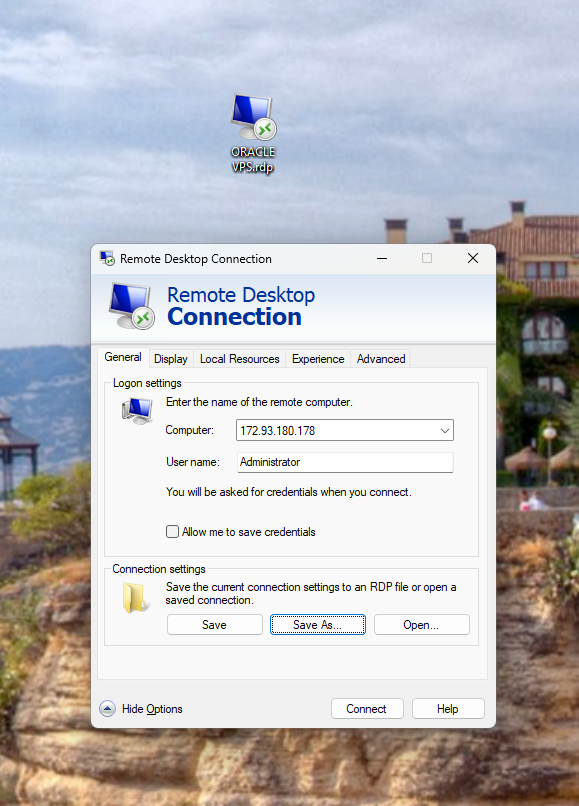
You'll now see an "ORACLE VPS" shortcut icon on your Desktop. Double-click it any time to connect to your trading server.
Your ORACLE VPS shortcut — double-click to connect
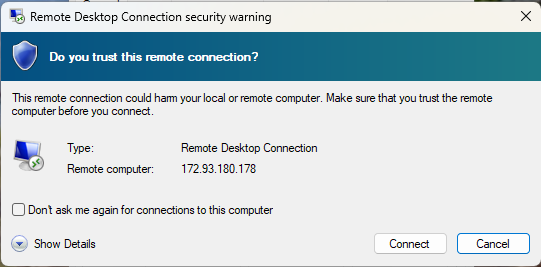
Double-click the shortcut and click Connect when the Remote Desktop dialog opens. Your IP and username are already saved.

Click Connect — your IP and username are pre-filled
Windows Security will ask for your credentials. Enter the Password you copied from QuantVPS in Step 4.
Check "Remember me" if you don't want to type your password every time.
If you see a certificate warning after this, click "Yes" to connect anyway — this is normal for VPS connections.
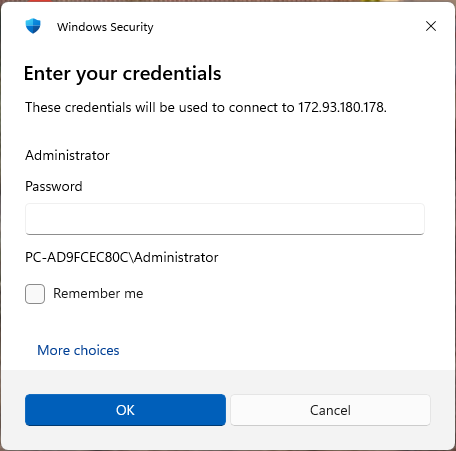
Enter your QuantVPS password and check "Remember me"
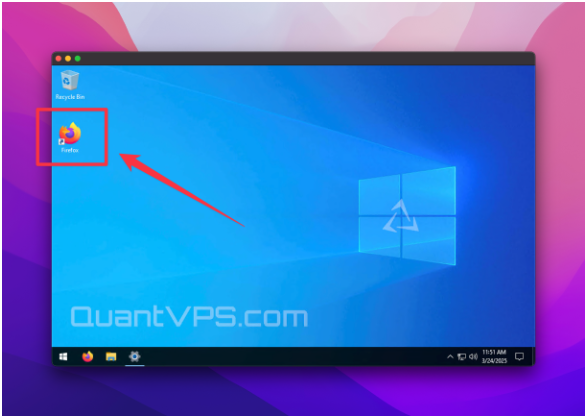
You should now see a full Windows Server desktop. This is your trading machine. It runs 24/7 in a Chicago data center with enterprise-grade internet.
Your VPS desktop — open Firefox to download NinjaTrader in the next step
Mac doesn't have Remote Desktop built in, but Microsoft makes a free app for it called Windows App.
Open the App Store on your Mac and search for "Windows App" by Microsoft.
It's free. Download and install it.
Go to your Applications folder or Launchpad, then open Windows App.
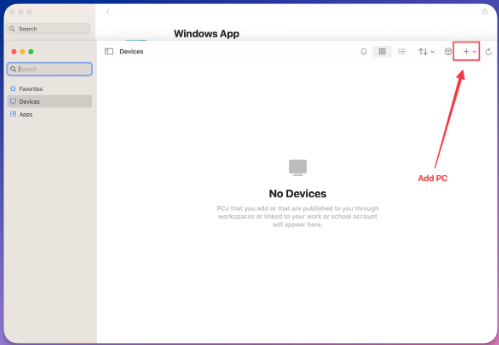
Click the "+" icon or "Add PC" to create a new connection profile.
Click the "+" button in the top right to add a new PC connection
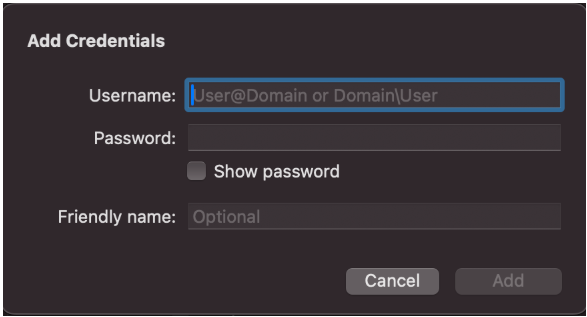
In the Add Credentials dialog:
Administrator)Click Add to save your credentials.
Enter your VPS username, password, and a friendly name
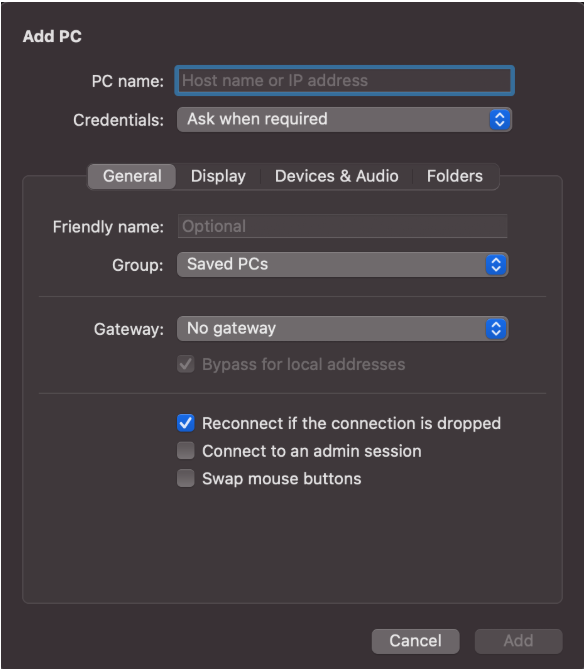
Back in the "Add PC" screen, click "Add" in the bottom right corner to save your settings.
Then click on your new VPS tile to initiate the connection. You'll now be logged in to your QuantVPS server — a full Windows desktop, just like sitting at a PC.
You should now see a full Windows Server desktop inside a window on your Mac. This is your trading machine.
Your VPS desktop — open Firefox to download NinjaTrader in the next step
If you want to change how your VPS appears on your screen:
Set a custom resolution under the Display tab for the best experience
Open Finder → Applications, find Windows App, and drag it to your Dock. One click opens the app, and your OracleVPS connection is waiting right there.
You now have a dedicated Windows trading machine running 24/7 in a Chicago data center. Here's what to do next:
From this point forward, NinjaTrader installation, algorithm setup, and account connections all happen inside your VPS — not on your personal computer. Connect to your VPS first, then continue with the next step.